Introduction
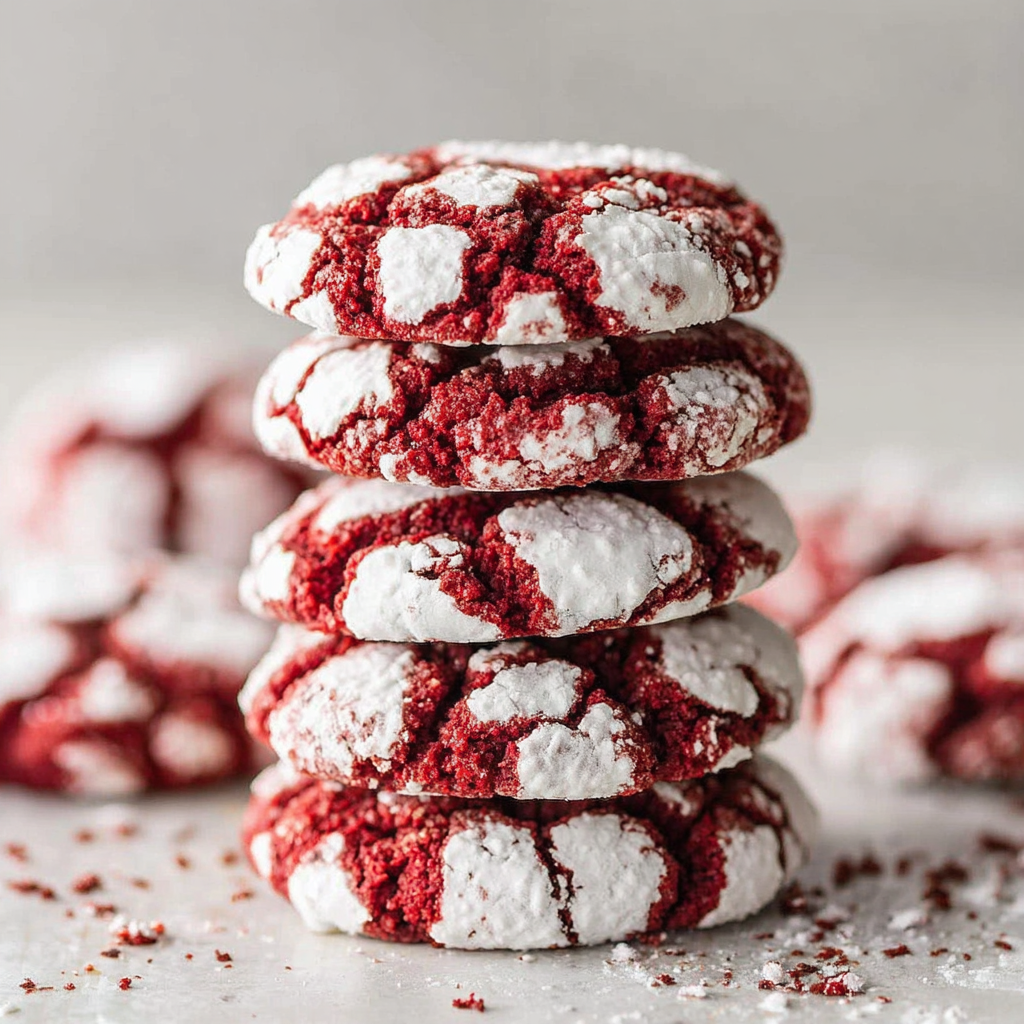
Red Velvet Crinkle Cookies are a delightful twist on a classic favorite, merging the rich, velvety flavor of red velvet cake with the soft, chewy texture of cookies. Their striking appearance, with a beautiful red hue topped with a dusting of powdered sugar, makes them an inviting treat for any occasion.
These cookies offer not just a feast for the eyes but also for the palate, with a hint of cocoa and a subtle tanginess that perfectly complements the sweetness. They are moist and soft inside but possess a slightly crisp outer layer, creating a satisfying contrast that will leave your taste buds dancing.
Whether you're baking for a special event, a holiday gathering, or simply treating yourself, these Red Velvet Crinkle Cookies are sure to impress. Let's dive into the ingredients and steps needed to create this decadent culinary delight.
Ingredients
- 2 cups all-purpose flour
This forms the base of the cookie, providing structure. Flour also helps absorb moisture, ensuring a balanced texture. Using the right type is crucial for achieving the desired cookie consistency. - 1/4 cup unsweetened cocoa powder
Cocoa powder adds depth of flavor and a subtle chocolate taste, essential to the red velvet experience. It also contributes to the cookie's rich color and acts as a balancing agent to the sweetness. - 1 teaspoon baking powder
This leavening agent is vital as it creates air pockets during baking, allowing the cookies to rise. It helps create the chewy texture that is characteristic of crinkle cookies. - 1/2 teaspoon baking soda
Baking soda helps the cookies spread as they bake while enhancing their chewiness. It works with the acidic components in the recipe to produce a light texture. - 1/2 teaspoon salt
Salt enhances the overall flavor, balancing the sweetness and adding depth. It also plays a role in strengthening the gluten structure, contributing to a pleasing chew. - 1/2 cup unsalted butter, softened
Butter adds richness and flavor while ensuring the cookies remain soft and tender. The creaming process with sugar helps to incorporate air, increasing the volume of the cookies. - 1 cup granulated sugar
Sugar not only sweetens the cookies but also aids in browning and creating a desirable texture. The right amount of sugar is essential for the cookies to hold their shape. - 1 large egg
Eggs are crucial for binding the ingredients together and providing moisture. They also contribute to the cookies' chewiness and overall structure. - 1 tablespoon red food coloring
This is what gives the cookies their signature red hue. The amount can be adjusted based on how vibrant you want the cookies to appear. - 1 teaspoon vanilla extract
Vanilla adds depth to the cookie's flavor, enhancing the sweetness and creating a more complex taste profile. - 1 cup powdered sugar (for rolling)
This adds a delightful sweetness and creates the signature crinkle effect on the cookies' surface. It contrasts well with the rich flavor of the cookie.
Directions & Preparation
Step 1: Preheat your oven to 350°F (175°C) and line a baking sheet with parchment paper.
Preheating your oven ensures even baking, allowing the cookies to develop their texture properly. The parchment paper prevents sticking and makes cleanup easy.
Step 2: In a bowl, whisk together the flour, cocoa powder, baking powder, baking soda, and salt.
This step helps evenly distribute the dry ingredients, ensuring that the leavening agents and cocoa are thoroughly mixed. Proper mixing guarantees consistent texture and flavor in the cookies.
Step 3: In another bowl, cream the softened butter and granulated sugar until light and fluffy.
Creaming incorporates air into the butter, which helps the cookies rise. The texture should be light and smooth, which contributes to the final chewy interior of the cookie.
Step 4: Add the egg, food coloring, and vanilla extract to the butter mixture and mix until well combined.
This step introduces moisture and flavor, creating a cohesive dough. The food coloring should be added gradually to achieve the desired hue without over-saturation.
Step 5: Gradually add the dry ingredients to the wet ingredients, mixing until just combined.
Mixing just until combined ensures the cookies remain tender. Over-mixing can develop gluten, resulting in tougher cookies rather than the desired chewy texture.
Step 6: Refrigerate the dough for at least 30 minutes to firm it up.
Chilling the dough helps to solidify the fats, preventing the cookies from spreading too much during baking. It also enhances the flavors and makes the dough easier to handle.
Step 7: Scoop portions of the chilled dough and roll them into balls, then coat them in powdered sugar.
Rolling the dough in powdered sugar before baking creates the crinkled appearance. The sugar also caramelizes slightly in the oven, adding to the texture and flavor.
Step 8: Place the dough balls on the prepared baking sheet, spacing them a few inches apart.
Proper spacing allows the cookies room to spread without merging into one another. This spacing is key to maintaining the characteristic crinkle effect.
Step 9: Bake for 10-12 minutes until the edges are set but the centers look soft.
This timing ensures the cookies are baked perfectly: set on the outside but still slightly underbaked in the middle for a soft, chewy texture. Keep an eye on them as oven temperatures can vary.
Step 10: Remove from the oven and let cool on the baking sheet for a few minutes before transferring to a wire rack.
Cooling on the sheet allows the cookies to firm up slightly before moving them, preventing breakage. The wire rack promotes even cooling.

The Secret to Flavorful Red Velvet
Achieving a rich red velvet flavor goes beyond just food coloring. Key ingredients like cocoa powder and a touch of vinegar can enhance the unique taste profile of these cookies. The natural acidity from the vinegar complements the cocoa, creating a sophisticated flavor that distinguishes red velvet from other chocolate desserts.
Mastering the Perfect Crinkle Effect
The iconic crinkle finish on Red Velvet Crinkle Cookies is achieved through a combination of rolling in powdered sugar and the baking technique itself. As the cookies bake, the sugar coating caramelizes slightly, while internal moisture causes the tops to crack, resulting in an appealing visual contrast that signals a soft, chewy interior.
Enhancing Your Cookie Experience
To elevate your Red Velvet Crinkle Cookies, consider adding complementary flavors or mix-ins. Nuts like walnuts or pecans can introduce a crunchy texture, while adding white chocolate chips offers a delightful sweetness that contrasts beautifully with the cocoa flavor. Experimenting with these variations keeps your cookie game exciting!
FAQs
What should I do if my cookie dough is too sticky?
If your dough is too sticky to handle, try chilling it for an additional 15-20 minutes in the refrigerator. This will firm it up, making it easier to roll into balls.
Why did my cookies spread too much during baking?
Excessive spreading can occur if the dough isn’t chilled properly before baking. Make sure to refrigerate the dough, as well as keeping your baking sheet cool.
Can I use a sugar substitute in this recipe?
Using a sugar substitute can alter the texture and taste of the cookies. If you choose to substitute, opt for a baking blend that measures similarly to granulated sugar.
What if my cookies are too dry after baking?
If your cookies turn out dry, it may have been due to overbaking or using too much flour. Next time, check for doneness a couple of minutes early to keep them soft.
How can I ensure my cookies stay soft after baking?
To keep your cookies soft, store them in an airtight container as soon as they’ve cooled, and consider placing a slice of bread in the container which helps retain moisture.
What can I add to my cookies to give them a festive twist?
Consider adding festive sprinkles or drizzling melted white chocolate over the cooled cookies to enhance both the flavor and appearance for holidays or special occasions.
Conclusion
Creating these Red Velvet Crinkle Cookies is a joyful baking adventure that results in a stunning and delicious treat. With their unique flavor profile and eye-catching appearance, they are bound to be a hit at any gathering or simply as a personal indulgence.
As you experiment and perfect your own batch, don’t hesitate to try variations to truly make them your own. Whether it’s incorporating a twist of flavor or adjusting the sweetness, the possibilities are as limitless as your imagination.
Recipe Card

Irresistibly Chewy Red Velvet Crinkle Cookies
Ingredients
Method
- Preheat your oven to 350°F (175°C) and line a baking sheet with parchment paper.
- In a bowl, whisk together the flour, cocoa powder, baking powder, baking soda, and salt.
- In another bowl, cream the softened butter and granulated sugar until light and fluffy.
- Add the egg, food coloring, and vanilla extract to the butter mixture and mix until well combined.
- Gradually add the dry ingredients to the wet ingredients, mixing until just combined.
- Refrigerate the dough for at least 30 minutes to firm it up.
- Scoop portions of the chilled dough and roll them into balls, then coat them in powdered sugar.
- Place the dough balls on the prepared baking sheet, spacing them a few inches apart.
- Bake for 10-12 minutes until the edges are set but the centers look soft.
- Remove from the oven and let cool on the baking sheet for a few minutes before transferring to a wire rack.
Notes
Additional serving suggestions: pair with a crisp salad, garlic bread, or roasted seasonal vegetables for balance.
For make-ahead, prep components separately and assemble just before heating to preserve texture.
Taste and adjust with acid (lemon/vinegar) and salt right at the end to wake up flavors.


