
Introduction
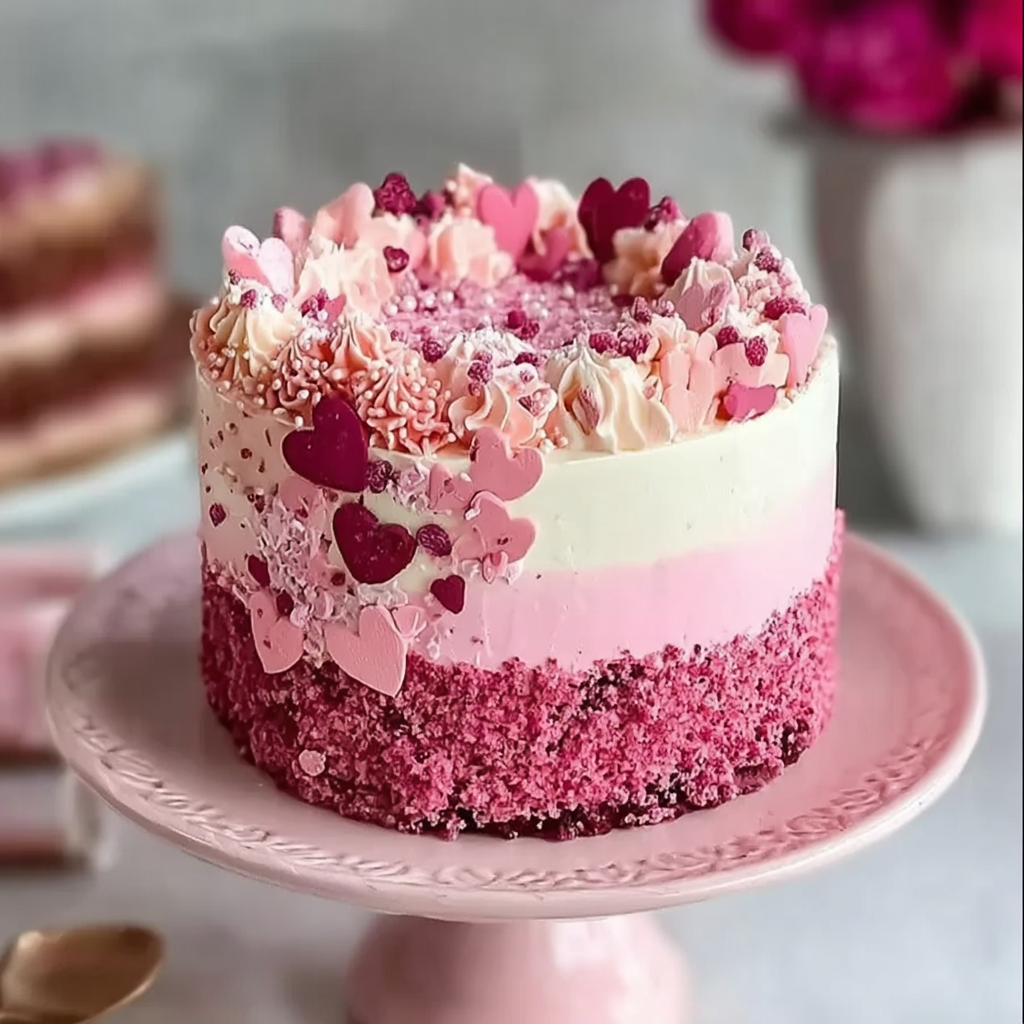
From birthday celebrations to casual family gatherings, a Pink Velvet Cake serves as a perfect centerpiece. With its striking hue and velvety texture, it captures attention even before the first slice is cut. This cake transcends standard dessert fare, delighting all who experience its sweetness.
Though often overshadowed by its red counterpart, Pink Velvet Cake is a delightful option that brings both nostalgia and modern flair to the table. Its tender crumb, paired with a subtle flavor profile, makes it versatile enough for any event. Let’s explore how to create this stunning confection at home.
Ingredients
- 2 ½ cups all-purpose flour
All-purpose flour provides the structure for the cake, lending it a light yet firm crumb that is essential in creating a delightful texture. - 1 ½ cups granulated sugar
Sugar not only sweetens the cake but also aids in creating a tender crumb. It contributes to the Maillard reaction during baking, affecting both color and flavor. - 1 cup unsalted butter, softened
Unsalted butter enriches the cake’s flavor and promotes moisture. Its fat content helps in creating a tender texture while adding richness. - 1 cup buttermilk, at room temperature
Buttermilk adds acidity, reacting with baking soda to create a light and airy crumb. Its tangy flavor complements the sweetness of the cake. - 3 large eggs, at room temperature
Eggs act as a binder and provide structure. They also contribute to moisture and richness, helping the cake rise beautifully. - 1 tablespoon vanilla extract
Vanilla extract enhances the cake's flavor, grounding the sweetness and providing depth to the overall taste. - 1 tablespoon baking powder
Baking powder is a leavening agent that helps the cake rise, creating a light texture. Proper measurement is crucial to avoid a dense cake. - 1 teaspoon baking soda
Baking soda further aids in leavening by creating carbon dioxide when reacted with buttermilk, enhancing the cake's fluffiness. - 1 teaspoon salt
Salt balances sweetness and enhances the flavors of the other ingredients. It is essential in ensuring a well-rounded taste. - 1-2 tablespoons red food coloring
This ingredient is responsible for the cake's signature pink hue. Adjusting the amount can yield a more vibrant or muted color. - Cream cheese frosting (for icing)
Cream cheese frosting adds a tangy sweetness that perfectly complements the cake's flavor. Its richness also contrasts with the soft texture.
Directions & Preparation
Step 1: Preheat your oven to 350°F (175°C) and prepare your cake pans.
Preheating the oven ensures even baking from the start. Greasing and flouring your cake pans prevents sticking, allowing the cakes to release smoothly after baking.
Step 2: In a large mixing bowl, cream together the softened butter and sugar until light and fluffy.
This step incorporates air into the butter, resulting in a lighter cake. Creaming the butter and sugar correctly is critical; if not done well, the cake may turn out dense.
Step 3: Add eggs one at a time, mixing well after each addition. Then, stir in the vanilla extract.
Adding eggs gradually helps in emulsifying the mixture, ensuring a uniform batter. Well-mixed ingredients contribute to a stable structure in the final cake.
Step 4: In a separate bowl, whisk together the flour, baking powder, baking soda, and salt.
Whisking the dry ingredients helps to evenly distribute the leavening agents and salt, which is crucial for balanced rising and flavor.
Step 5: Alternately add the dry ingredients and buttermilk to the butter mixture, starting and ending with flour.
This method maintains the batter's texture and prevents overmixing, which can make the cake tough. Ensure you mix just until combined to keep it tender.
Step 6: Add the red food coloring, and mix until you achieve your desired shade of pink.
Adjusting the food coloring quantity allows you to control the vibrancy of your cake. Blend well to ensure color distribution throughout the batter.
Step 7: Divide the batter evenly between the prepared pans and smooth the tops.
Creating an even surface allows the cakes to rise uniformly, resulting in uniform layers. Uneven layers can lead to a challenging frosting process.
Step 8: Bake in the preheated oven for 25-30 minutes, or until a toothpick inserted into the center comes out clean.
Proper baking time is essential. Overbaking can lead to a dry cake, while underbaking may result in a gummy texture. Trust the toothpick test.
Step 9: Allow the cakes to cool in the pans for 10 minutes before transferring them to a wire rack.
Cooling slightly in the pans helps set the structure of the cake. Transferring to a wire rack allows for even cooling to prevent sogginess from steam.
Step 10: Once completely cool, frost with cream cheese frosting and decorate as desired.
Frosting on a well-cooled cake prevents melting and sliding. You can choose to layer and pipe decorative features or keep it simple for an elegant look.

Choosing the Right Shade
The hue of a Pink Velvet Cake plays a significant role in its appeal. Selecting the right shade of red food coloring allows bakers to personalize their cake. Whether you prefer a light pastel pink or a deeper rose, the amount of food coloring can be adjusted to match the occasion, ensuring it's as visually stunning as it is delicious.
Pairing Flavors
While the cake's flavor is delightful on its own, pairing it with complementary flavors can elevate it even further. Consider adding a splash of almond extract to the batter for a nuanced taste or topping with fresh berries to introduce acidity and texture. These combinations can create a dynamic dessert experience that surprises and delights your guests.
Presentation Matters
A beautiful cake deserves a beautiful presentation. Consider using decorative piping techniques with the cream cheese frosting to create eye-catching designs. Garnishing with edible flowers or sprinkles can enhance the visual appeal. Remember, the first impression is often the most lasting, so don’t skimp on aesthetics when presenting your Pink Velvet Cake.
FAQs
What makes Pink Velvet Cake different from regular red velvet?
The primary difference lies in the food coloring used. Pink velvet uses red food coloring to achieve a pink hue, while red velvet typically has a deeper red tone. The flavor profile remains similarly rich and buttery.
Why did my cake turn out dense?
A dense cake may result from overmixing the batter, resulting in excess gluten formation. It's crucial to mix until just combined, especially after adding flour.
Can I use milk instead of buttermilk?
If you don’t have buttermilk on hand, you can substitute it with regular milk, adding a teaspoon of lemon juice or vinegar for acidity to mimic buttermilk’s effect.
What can I do if my cream cheese frosting is too thin?
If your frosting is too runny, try refrigerating it briefly to help it firm up. You can also add a little more powdered sugar to thicken it without compromising sweetness.
Can I scale this recipe for a larger cake?
Yes, you can easily double the recipe for larger gatherings. Just ensure to adjust your baking times and monitor the cake closely, as larger cakes may take longer to bake through.
What should I do if I didn’t use enough food coloring?
If your cake isn't pink enough, you can mix more food coloring into the frosting or a glaze to achieve the desired look without altering the cake's core structure.
Conclusion
Creating a Pink Velvet Cake is not only rewarding but also an exciting way to impress friends and family with a visually stunning dessert. Each slice promises not only a feast for the eyes but also a delightful experience on the palate.
So, roll up your sleeves, gather your ingredients, and indulge in the joy of baking this charming cake. Whether for a special occasion or just a weekend treat, the Pink Velvet Cake will surely bring smiles to all who enjoy it.
Recipe Card
Creating a Delightful Pink Velvet Cake for Any Occasion
Ingredients
Method
- Preheat your oven to 350°F (175°C) and prepare your cake pans.
- In a large mixing bowl, cream together the softened butter and sugar until light and fluffy.
- Add eggs one at a time, mixing well after each addition. Then, stir in the vanilla extract.
- In a separate bowl, whisk together the flour, baking powder, baking soda, and salt.
- Alternately add the dry ingredients and buttermilk to the butter mixture, starting and ending with flour.
- Add the red food coloring, and mix until you achieve your desired shade of pink.
- Divide the batter evenly between the prepared pans and smooth the tops.
- Bake in the preheated oven for 25-30 minutes, or until a toothpick inserted into the center comes out clean.
- Allow the cakes to cool in the pans for 10 minutes before transferring them to a wire rack.
- Once completely cool, frost with cream cheese frosting and decorate as desired.
Notes
Additional serving suggestions: pair with a crisp salad, garlic bread, or roasted seasonal vegetables for balance.
For make-ahead, prep components separately and assemble just before heating to preserve texture.
Taste and adjust with acid (lemon/vinegar) and salt right at the end to wake up flavors.


