Introduction
The holiday season brings an array of beloved traditions, and for many, Little Debbie Christmas Tree Cakes are among the favorites. These nostalgic treats evoke memories of biting into airy cake, creamy filling, and a luscious icing that encapsulates the joys of the season.
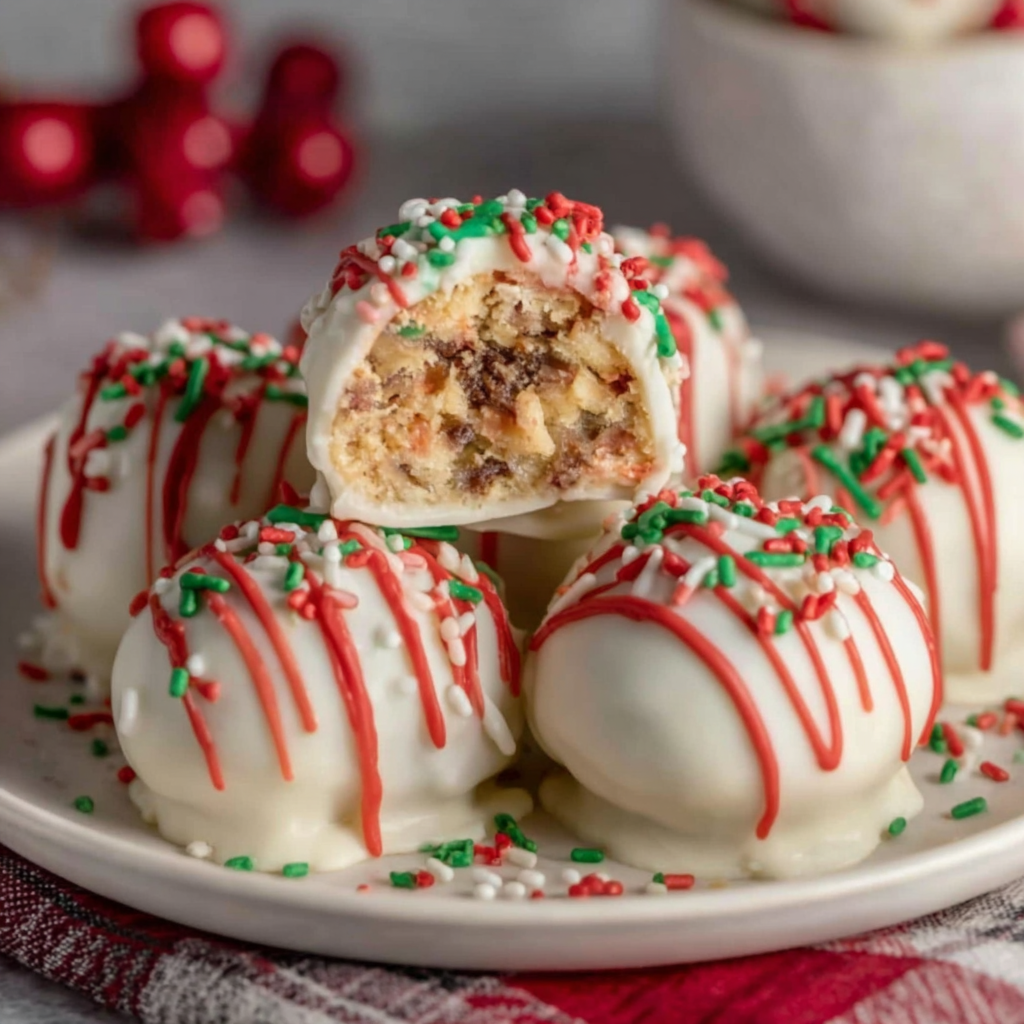
Inspired by this festive treat, we’re transforming the classic Christmas Tree Cake into truffles that will delight your friends and family. These no-bake confections combine the familiar flavors of vanilla cake and creamy frosting with the added bonus of easy preparation, making them perfect for holiday gatherings or as a special gift.
Ingredients
- 1 box Little Debbie Christmas Tree Cakes (12 cakes)
These iconic cakes serve as the base for our truffles, providing a dense and flavorful foundation with their vanilla cake and cream filling. - 8 ounces cream cheese, softened
Cream cheese acts as the binder, adding richness and moisture to the mixture, which helps achieve the truffle's creamy texture. - 2 cups white chocolate chips
Melting white chocolate will coat the truffles and create a sweet, glossy finish that enhances the festive presentation. - 1 teaspoon vanilla extract
Vanilla extract boosts the overall flavor profile of the truffles, marrying perfectly with the cake's vanilla essence. - Sprinkles or edible glitter for decoration
These colorful additions not only enhance the visual appeal of the truffles but also reinforce the holiday spirit when serving.
Directions & Preparation
Step 1: Prepare the cake mixture.
Begin by crumbling the Little Debbie Christmas Tree Cakes into a large mixing bowl. This step is essential, as achieving the right crumb texture is key for melding with the cream cheese. Be sure to break the cakes down into small bits to ensure even mixing; you want a uniform consistency that will bind well when combined with the cream cheese.
Step 2: Mix in the cream cheese and vanilla.
Add the softened cream cheese and vanilla extract to the crumbled cakes and mix until fully combined. The cream cheese not only binds the mixture but also adds a tangy richness that offsets the sweetness of the cakes. Use your hands or a spatula to ensure an even distribution, aiming for a dough-like consistency.
Step 3: Chill the mixture.
Transfer the mixture to the refrigerator for about 30 minutes. Chilling helps solidify the dough, making it easier to form into truffles. It’s crucial not to skip this step, as it will also enhance the flavor profile, allowing the ingredients to meld together.
Step 4: Shape the truffles.
Once chilled, use a cookie scoop or your hands to form small balls, about one inch in diameter. The uniform size ensures even coating and consistent truffle quality. Place the shaped truffles on a parchment-lined baking sheet, allowing space between each for easy handling.
Step 5: Melt the white chocolate.
In a microwave-safe bowl, melt the white chocolate chips in short intervals, stirring frequently. Properly melting the chocolate is crucial; overheating can cause it to seize. Achieve a smooth, dripping consistency, which will coat the truffles beautifully.
Step 6: Dip the truffles in chocolate.
Using a fork or toothpick, dip each truffle into the melted white chocolate, ensuring an even coat. Allow any excess chocolate to drip off before placing the truffle back on the baking sheet. This step adds not only flavor but a glossy finish that is visually appealing.
Step 7: Decorate the truffles.
Before the chocolate coating sets, sprinkle with festive toppings like sprinkles or edible glitter. This final touch adds a celebratory flair to your truffles, making them perfect for festive occasions. The decoration is both aesthetic and adds a delightful crunch when bitten into.
Step 8: Chill again before serving.
Refrigerate the truffles for at least 30 minutes to allow the chocolate to firm up. This not only stabilizes the chocolate shell but also helps enhance the flavor as the truffles chill, melding all the sweet elements together for a perfect bite.

The Nostalgia of Little Debbie Treats
Little Debbie Christmas Tree Cakes have been a staple in holiday festivities for decades. Their recognizable shape and festive icing take us back to simpler times of childhood joy. By transforming this nostalgia into truffles, we not only embrace those shared memories but also create new traditions that can be enjoyed by all ages.
A Perfect No-Bake Treat
These truffles stand out not just for their flavor but also for their ease of preparation. Being a no-bake dessert means they require minimal kitchen effort, making them perfect for busy holiday schedules. They can easily be whipped up in an afternoon and are a great project to involve children in the festive spirit.
Customizations and Variations
Feel free to make these truffles your own. You can experiment with different coatings such as milk chocolate or dark chocolate to cater to different tastes. Additionally, consider adding flavors like peppermint extract for a seasonal twist or incorporating chopped nuts for an added crunch to diversify texture and flavor.
FAQs
What should I do if the mixture is too crumbly?
If the mixture feels too dry and crumbly, consider adding an additional tablespoon of softened cream cheese. This will help bind the ingredients together and achieve the right consistency for rolling.
How do I prevent my chocolate from seizing?
When melting chocolate, ensure that no water or moisture comes into contact with it, as this causes it to seize. Use a microwave or double boiler and stir frequently to maintain a smooth consistency.
Can I use a different type of cake as a base?
Yes, you can use other types of cakes with similar textures for your truffles, but keep in mind that the flavor profile will change. Vanilla or confetti cakes could be suitable alternatives.
Why are my truffles not holding their shape?
If the truffles are too warm or the mixture wasn't chilled long enough, they may lose shape. Ensure to chill them thoroughly before rolling and dipping.
How can I make these truffles more festive?
In addition to colorful sprinkles, you can also drizzle contrasting chocolate over the truffles or use seasonal themed molds to give them unique shapes.
What if my chocolate coating is too thick?
If the chocolate coating appears too thick, try adding a small amount of shortening or coconut oil to the melted chocolate to thin it out. This will provide a smoother finish on your truffles.
Conclusion
These Little Debbie Christmas Tree Cake Truffles are not only a delightful dessert but also a way to celebrate the cherished memories of the holidays. Simple in preparation yet impressive in taste and presentation, they make perfect gifts or party treats.
Bring these truffles to your next gathering or whip up a batch for a cozy night in, and let the festive flavors bring joy to your home. Enjoy the smiles they create as everyone indulges in these delightful bites of nostalgia.
Recipe Card

Delicious Little Debbie Christmas Tree Cake Truffles
Ingredients
Method
- Prepare the cake mixture.
- Mix in the cream cheese and vanilla.
- Chill the mixture.
- Shape the truffles.
- Melt the white chocolate.
- Dip the truffles in chocolate.
- Decorate the truffles.
- Chill again before serving.
Notes
Additional serving suggestions: pair with a crisp salad, garlic bread, or roasted seasonal vegetables for balance.
For make-ahead, prep components separately and assemble just before heating to preserve texture.
Taste and adjust with acid (lemon/vinegar) and salt right at the end to wake up flavors.


