Introduction
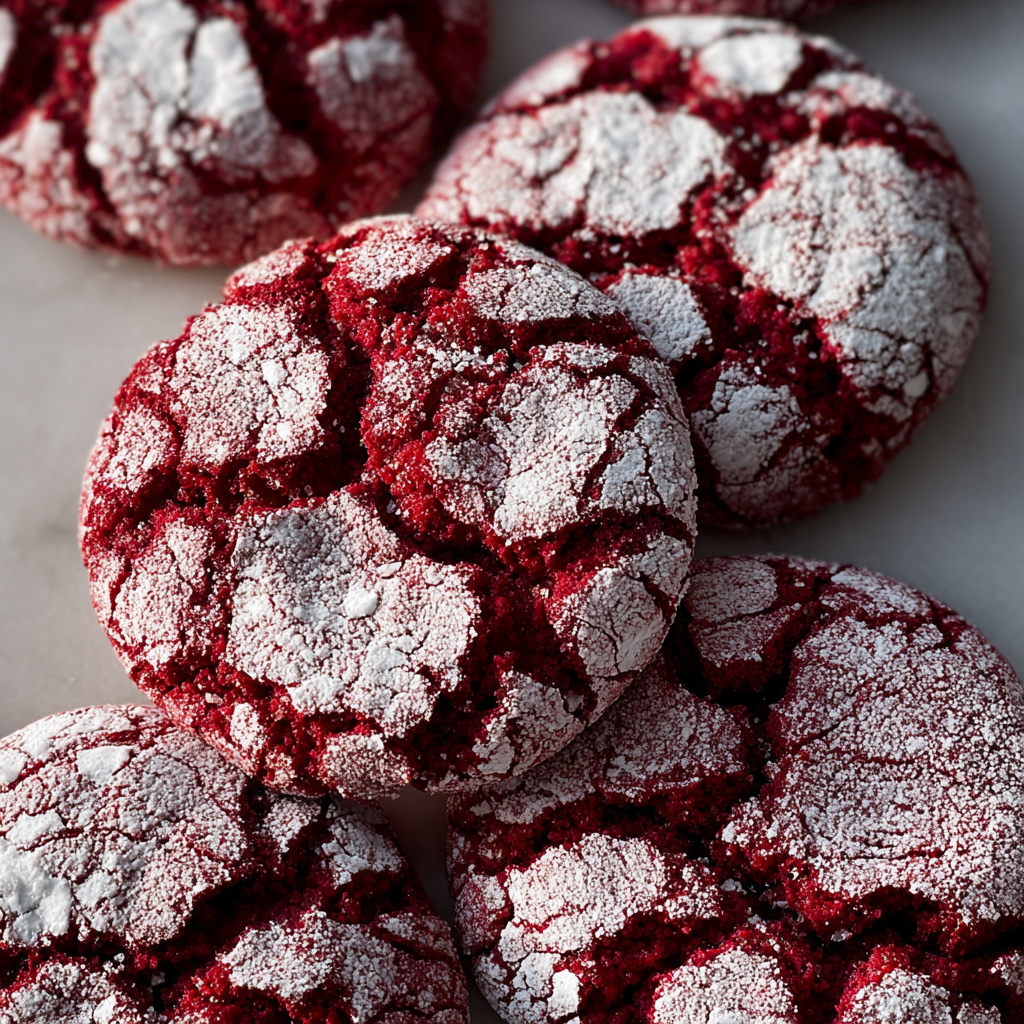
Red Velvet Crinkle Cookies are a delightful twist on classic cookies that merge the rich flavor of red velvet cake with the enticing texture of crinkle cookies. With their stunning hue and irresistible sweetness, these cookies are perfect for holidays, special occasions, or simply to satisfy a sweet tooth.
The unique combination of soft, cakey interiors and slight crispiness on the outside creates a cookie that is both visually appealing and deliciously rewarding. Enhanced by a touch of cocoa and a hint of cream cheese flavor, they invite everyone to indulge in their charm.
With just a few simple ingredients, you can create these tempting crinkles that are sure to impress family and friends alike. Let’s embark on this baking adventure and make these scrumptious treats.
Ingredients
- 2 cups all-purpose flour
All-purpose flour provides the structure necessary for the cookies to hold their shape while remaining soft and chewy. It also plays a role in absorbing moisture and allows for a pleasing texture in the final cookie. - 1/4 cup cocoa powder
The cocoa powder adds a subtle chocolate flavor along with the signature red velvet taste. It not only contributes to the coloring but also helps to deepen the flavor profile of the cookies. - 1 tsp baking powder
Baking powder acts as a leavening agent, helping cookies rise and become fluffy. It is essential for creating that soft and chewy interior, ensuring a delightful texture with every bite. - 1/2 tsp salt
Salt enhances the overall flavors in the cookie, balancing the sweetness and bringing forth the richness of the cocoa. It plays a crucial role in elevating the flavors of all ingredients. - 1/2 cup unsalted butter, softened
Softened butter adds richness and flavor to the cookies, while also contributing to the desired texture. It helps achieve a tender crumb while allowing for easier mixing with the sugars. - 1 cup granulated sugar
Granulated sugar sweetens the cookies and aids in creating the perfect texture. It helps the cookies spread as they bake, leading to that recognizable crinkle appearance. - 1/2 cup brown sugar, packed
Brown sugar adds moisture and a hint of caramel flavor to the cookies. Its slight acidity complements the cocoa and balances the sweetness, contributing to a chewier consistency. - 2 large eggs
Eggs are essential for binding the ingredients together, enhancing the structure and moisture of the cookies while helping them rise as they bake, resulting in a soft interior. - 2 tsp vanilla extract
Vanilla extract enhances the overall flavor of the cookies, adding depth and warmth. Its aroma also contributes to the enticing scent of the cookies as they bake. - 1 tbsp red food coloring
Red food coloring is what gives these cookies their iconic vibrant hue. A small amount is enough to achieve that striking color characteristic of red velvet treats. - 1/2 cup powdered sugar (for coating)
Powdered sugar adds a sweet dusting to the cookies, creating a beautiful contrast against the deep red color. It also contributes to the cookies’ signature crinkle appearance.
Directions & Preparation
Step 1: Preheat your oven to 350°F (175°C) and line baking sheets with parchment paper.
Preheating the oven is crucial to ensure that your cookies bake uniformly and rise properly. Lining the baking sheets with parchment paper prevents sticking and makes cleanup easier, ensuring that you achieve perfect results with minimal mess.
Step 2: In a bowl, whisk together all-purpose flour, cocoa powder, baking powder, and salt.
This step helps to evenly distribute the dry ingredients, ensuring that the cocoa powder and leavening agents are well incorporated. This prevents clumping and allows for a consistent texture in your cookies, leading to even baking.
Step 3: In a large mixing bowl, cream together the softened butter, granulated sugar, and brown sugar until light and fluffy.
Creaming the butter and sugars incorporates air into the mixture, which is essential for achieving that light and fluffy texture. This process also dissolves the sugars, allowing for better blending of the remaining ingredients.
Step 4: Add the eggs one at a time, mixing thoroughly after each addition, then stir in the vanilla extract and red food coloring.
Adding the eggs one at a time allows for better incorporation into the butter-sugar mixture, ensuring a smooth batter. The vanilla extract adds flavor, while the food coloring transforms the mixture into that stunning red hue, essential for red velvet cookies.
Step 5: Gradually add the dry ingredients to the wet mixture, mixing until just combined.
It's important to mix until just combined to avoid overworking the dough. Overmixing can lead to tough cookies, so fold in the dry ingredients gently, ensuring a tender and soft consistency in the final cookie.
Step 6: Spoon out the dough and roll it into balls, then roll each ball in powdered sugar until thoroughly coated.
Rolling the dough into balls helps create the crinkle shape during baking. The powdered sugar coating is what allows the crinkles to form by preventing the tops from crisping too early, revealing that delightful contrast between the red and white.
Step 7: Place the cookie balls on the prepared baking sheets, spaced apart about 2 inches apart.
Spacing the cookie dough balls properly allows for enough room for spreading during baking. If they are too close together, they'll merge into each other, resulting in irregular shapes instead of perfectly formed crinkles.
Step 8: Bake in the preheated oven for 12-15 minutes, or until the edges look set, but the centers remain soft.
Baking the cookies until the edges are set while keeping the centers soft is key to achieving that melt-in-your-mouth texture. The cookies will continue to cook slightly after removal, so err on the side of underbaking to maintain chewiness.
Step 9: Allow the cookies to cool on the baking sheets for a few minutes before transferring them to a wire rack to cool completely.
Cooling the cookies on the baking sheets allows them to set up a bit more, making them easier to move. Transferring them to a wire rack afterward ensures even cooling, preventing sogginess from retained moisture.

The Science Behind Crinkles
The beautiful crinkle effect on these cookies is a result of how the outer surface sets as they bake, contrasting with the soft dough within. The powdered sugar coating not only adds sweetness but also helps the cookies crack and spread. Understanding this reaction can help you achieve that perfect texture, capturing the essence of what makes crinkle cookies so appealing.
Cream Cheese Icing: A Flavorful Twist
To elevate your Red Velvet Crinkle Cookies, consider drizzling them with cream cheese icing. This addition brings that classic red velvet cake flavor into the cookies, complementing their sweetness. A simple cream cheese frosting is easy to whip up and can be applied generously for an extra touch of indulgence.
Celebration Cookies for Every Occasion
These Red Velvet Crinkle Cookies aren’t just for holidays; they're versatile enough to adorn any gathering or celebration. Their festive color makes them perfect for Valentine’s Day, birthdays, or bake sales. With their striking appearance and delicious taste, they’re sure to be a hit at any event.
FAQs
What if my dough is too thick to roll?
If your cookie dough is too thick, it may be due to over-measuring the flour. You can add a tiny bit of milk, one teaspoon at a time, until the dough reaches a better consistency for rolling.
I think my cookies turned out bland, what should I do?
If your cookies taste bland, you can enhance the flavor by adding a pinch more salt and vanilla extract next time, as these ingredients help to amplify sweetness and balance flavors.
Can I use all brown sugar instead of granulated sugar?
Yes, you can substitute all brown sugar for granulated sugar. However, be aware that it will result in a denser cookie with a richer flavor, which can still be delicious.
How do I prevent my cookies from spreading too much?
To prevent excessive spreading, ensure your butter is softened and not melted. Additionally, chilling the cookie dough for about 30 minutes before baking can help maintain their shape.
What should I do if my cookies are overcooked?
If your cookies are overcooked, try to adjust your baking time next time, testing them a couple of minutes before the recipe's time ends. Underbaked cookies will firm up as they cool.
Why are my cookies not as red as expected?
If your cookies are not red enough, you may need to increase the amount of food coloring slightly. Ensure you are using a gel or paste coloring for the best results, as liquid food coloring can dilute the dough.
Conclusion
Creating Red Velvet Crinkle Cookies is a rewarding experience that results in delectable treats everyone will love. Each bite offers a perfect balance of rich flavors and soft textures that make them irresistible.
Whether enjoyed fresh from the oven or shared with friends, these cookies are bound to bring joy and warmth to your home. So gather your ingredients and embrace the delicious adventure that awaits in your kitchen.
Recipe Card
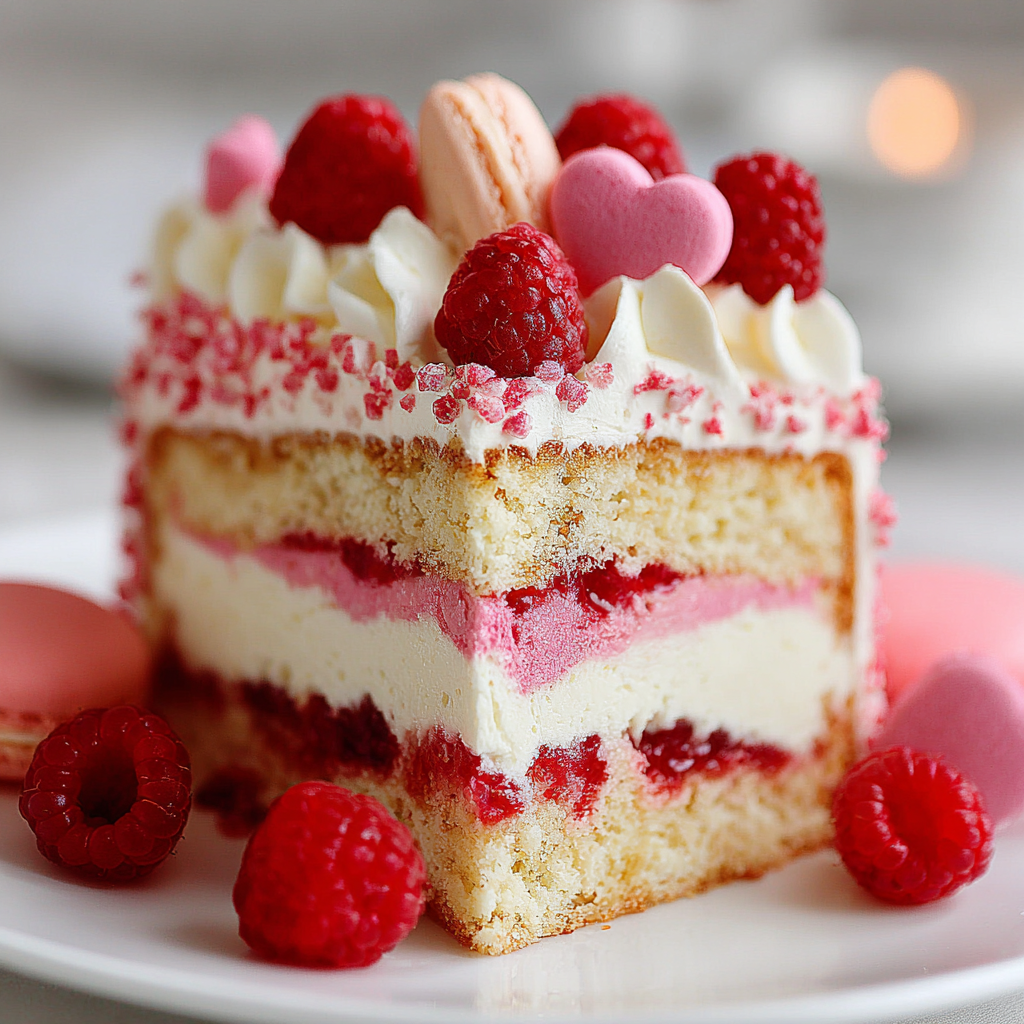
Creating a Delightful Valentine’s Day Cake at Home
Ingredients
Method
- Preheat your oven to 350°F (175°C).
- Grease and flour two 9-inch round cake pans.
- In a large bowl, cream the softened butter and sugar together until light and fluffy.
- Add the eggs one at a time, beating well after each addition.
- Stir in the vanilla extract.
- In another bowl, whisk together the flour, baking powder, and salt.
- Gradually add the dry ingredients to the butter mixture, alternating with buttermilk.
- Pour the batter evenly into the prepared pans.
- Bake in the preheated oven for 25-30 minutes or until a toothpick comes out clean.
- Allow cakes to cool in the pans for 10 minutes, then transfer to a wire rack to cool completely.
- Prepare the cream cheese frosting by beating cream cheese until smooth, then gradually add powdered sugar and milk until desired consistency is achieved.
- Assemble the cake by placing one layer on a serving plate, spreading a layer of frosting on top, then adding the second layer.
- Frost the top and sides of the cake with the remaining cream cheese frosting.
- Decorate as desired and slice to serve.
Notes
Additional serving suggestions: pair with a crisp salad, garlic bread, or roasted seasonal vegetables for balance.
For make-ahead, prep components separately and assemble just before heating to preserve texture.
Taste and adjust with acid (lemon/vinegar) and salt right at the end to wake up flavors.


